Showing posts with label Stickles. Show all posts

Wednesday, December 28, 2011

Winter Scene

Last week I could hardly contain my excitement over Christmas.  I just can't help myself.  Christmas always brings back fond, warm and cozy, happy memories. 

I have been keeping journals the last few months.  Mostly I have been rewriting verses with the hope that they would sink in.  Sometimes I add my own thoughts or little prayers to my almost daily verse writing.  And sometimes I feel inspired to add pictures of some sort. 

I needed to start a new notebook and since I will be running into the month of January I didn't want it to be all Christmas looking and decided to go into snowflakes and such.  Because I live in the desert, it is very difficult to find snow.  So, I went online and found some beautiful winter pictures.  I don't like the cold of winter but I do love the snow.  I found some really great winter scenes at this website.  http://images.search.yahoo.com/search/images?_adv_prop=image&fr=yfp-t-701&va=winter


I took the above picture and added Stickles.  Both Crystal and Icicle Stickles and some Liquid White Pearls.  I used my newest little toys (Big Shot by Stampin' Up) and (Tim Holtz Alterations Townscape) the other day and cut out a row of houses on colorful paper.  I covered the houses in Crystal Stickles and added the Liquid White Pearls to the roof tops and house fronts to give it dimension and make it look like snow.  I then added the Townscape cut out to give the picture a pop of color.

I hope you enjoy this wintry image!

Sunday, July 31, 2011

Only Ovals and Brads

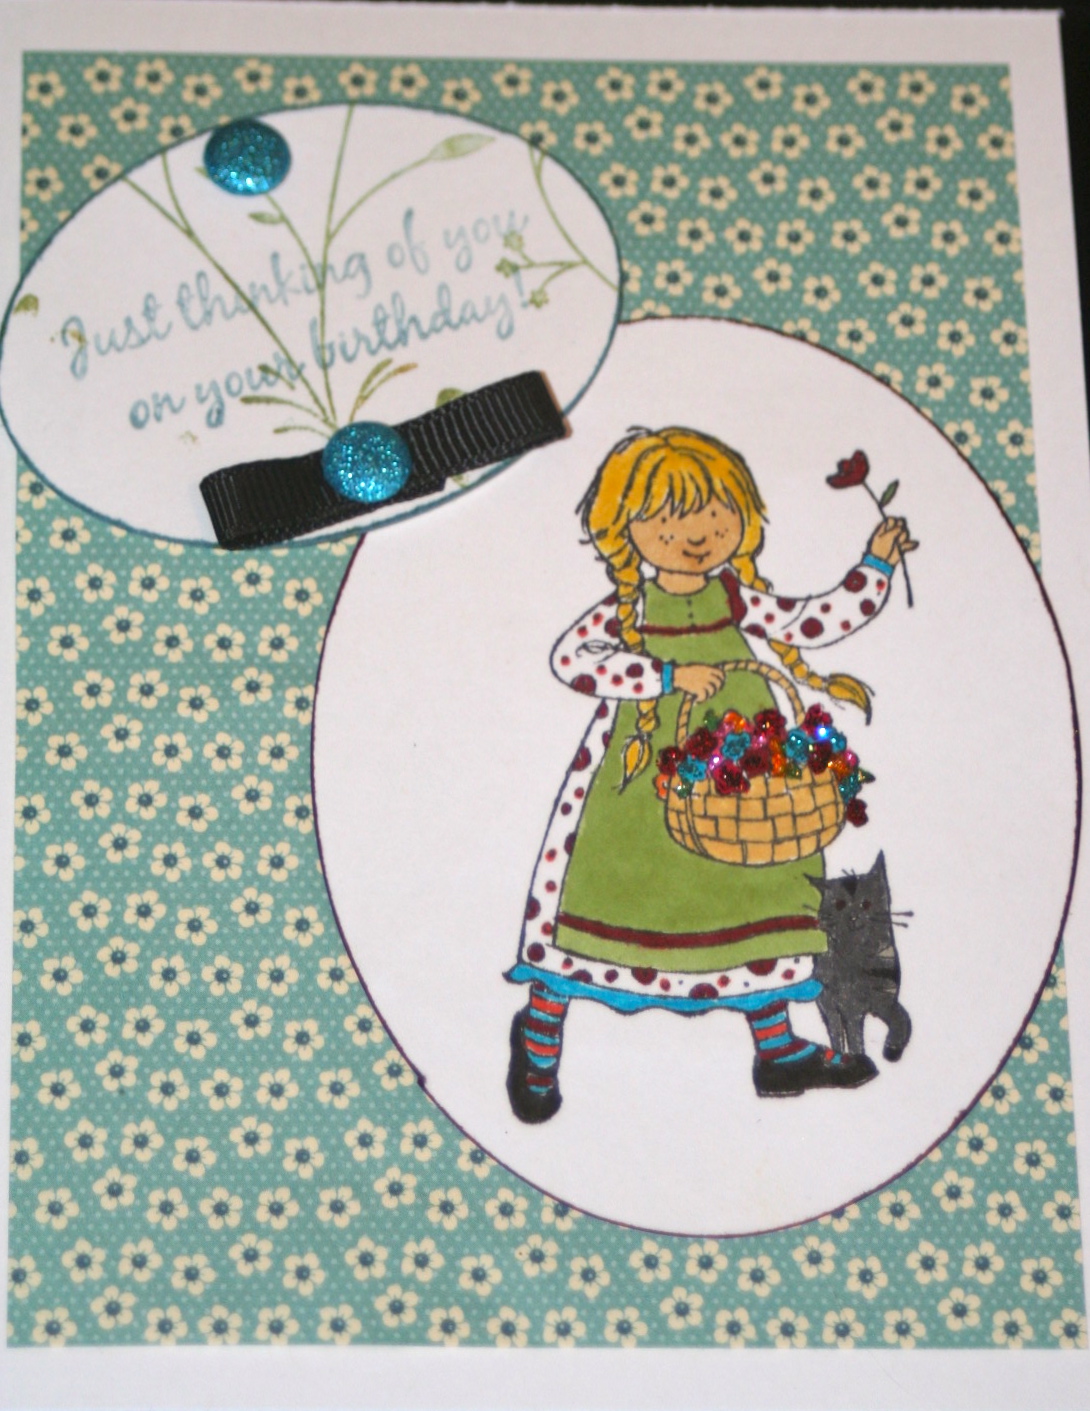
This is just a quick post today as I need to do somethings and head over to my in-laws to celebrate my brother-in-law's birthday today.  Happy Birthday Jeff!

This is not his card.  I don't think he would appreciate the sparkling blue brads I used and I can't see him appreciating the blond little girl holding flowers.  I did make this card with a friend in mind, and it answered the Created ByHand Challenge "Only Ovals and Brads" http://createdbyhandchallenge.wordpress.com/.


This coming week:  Pool update, Vegas style birthday card and a card for a Rutgers grad.  

Wednesday, July 27, 2011

Happy Belated Birthday and some muses

"Funny things about birthdays.  They come once year."  This year we celebrated my mother-in-law's birthday.  My father-in-law's birthday was yesterday so I want to make sure I do a "shout out" to him also.  I had a lot of fun putting my mother-in-law's card together.  I told myself a long time ago not to buy paper unless I have a specific purpose because I was purchasing paper and not using it.  However, there is a store in my town Paper Vineyard that has the best selection of papers.  They carry paper from 7 Gypsies and Graphics 45 and that is just two of many.  Anyway, I purchased this paper knowing that at some point I would use it. 

My mother-in-law practically grew up at Coney Island.  On my Graphics 45 paper one of the cut outs had a picture of Coney Island so I used that as my inspiration for my mother-in-law's card. I wasn't sure at first how I was going to use this image but then I decided it would be fun to make a collage so I used the other cut outs from the same sheet.  Once I decided on the placement and attached them, I decided to try a coat of glazing over the collage.


I decided I wanted to add some fun dimensions.  I first added some bling from a package of stickers that I had from Stampin' Up to the card and then I went shopping for something, but I wasn't sure exactly what I would find.  I went to Hobby Lobby and found some really fun buttons.  There was a package of buttons that were sunglasses.  They are from Dress It Up buttons http://dressitup.com/.  I also found another package of shell buttons and I thought they would go perfectly with the card so I bought that package too. 

Finally, I added Distressed Stickles to frame my collage and I added Waterfall Stickles on top of the collage to give a sparkling water effect.


I decided to go antique with my father-in-law's card.  I first took paper that looked like newspaper ads (Stampin' Up) and stained the paper in distress ink, sprayed it with Color Wash Terra Cotta (Ranger Ink)  and  Perfect Pearls Mists heirloom gold.  I used several Tim Holtz® Idea-ology™ | Paperie alvage Stickers - Lost & Found.  In this pack there are license plates from most of the different states.  I chose to use 4 different plates from states that my father-in-law lived, and a July calendar and a theater ticket stub sticker.  I distressed the stickers with distress inks and heirloom gold Perfect Pearls Mists.  I punched out and distressed the label and simply used the stamp from Stampin' Up "Let's Celebrate!" stamp. 


So, Happy Belated Roberta and Leo!


Now with Emily off to Kindergarten, what is a mom suppose to do? That has been the number one question I have been asked this past year. I have many an unfinished project that needs to be done, and I am quite looking forward to completing these projects.

Yesterday  after I dropped off my children at school, I came home and put my breakfast together.  I have to say, it was very nice to be able to put my breakfast together and get to eat without 5 interruptions.  I decided to go back to eating fruit in the morning as I am on a quest to eat healthier and lose some (well I should be truthful - A LOT- of weight).


Then I set out to declutter our breakfast bar.  I guess I do miss the "mom" that has been frequently called out the past 11 years, because I decied to go check on Emily at lunch time.  Of course, I also had a reason for checking on her.  On Monday when I made sure the lunch boxes were all cleaned out, I realized that Emily never opened her drink.  I asked her why she didn't drink it, and she said that even though she raised her hand no one helped her.  I'm not sure if that is the case or not.  I am sure that the first day of school with Kindergartners can be pretty hectic so I decided I would make sure that she got some help with her drink and went to visit her at lunch.  Here she is and she got her drink opened by one of the lunch aids.  Hm, well maybe I guess I will go one more day just to make sure all is well with her drink today.  Am I being the over concerned parent?  Oh, I hope not.  Of course, perhaps, they would appreciate the extra set of hands.

Saturday, July 9, 2011

America The Beautiful

The Created By Hand challenge http://quietfire.ning.com/group/createdbyhandchallenge/forum/topics/fireworksmetallics-1 this week is fireworks/metallics which gave me the perfect excuse to pull out my alcohol inks which I haven't used in a while.  I also used some glossy paper which I haven't used in a very long time.  Glossy paper, alcohol inks, and metallic inks is an excellent combination for a shimmery background.  I didn't have any fireworks stamps or pictures so I used some of my Tim Holtz idea-ology Salvage Stickers - Seasonal collection.  I first used pool colored alcohol ink with Silver metallic ink (Ranger Inks) with my applicator and dabbed it all over my glossy paper.  I then added my stickers.  I first went over with Barn Door red and used perfect pearls blue sapphire.  I then painted liquid white pearls over the entire image.  I finished it off with True Blue Stickles and Icicle Stickles (Ranger Ink).

Friday, July 30, 2010

Sheltering Tree/Green Challenge


I made this card for this week's challenge Sheltering Tree/Green Challenge by Created by Hand http://createdbyhandchallenge.wordpress.com/. I started out with one of my favorite stamps from Stampin' Up (Pretty Petals). I inked it up in one of the newer Distressed Ink Colors (Forest Moss). I then sponged in Distress Ink Antique Linen. I then took another paper and my blending tool and colored the paper in Distress Ink Crushed Olive. I then went around the edges with my blending tool in Forest Moss. I inked up my stamp from Stampin' Ups (Friends 24-7) in Crushed Olive. I stamped over with the Birthday greeting in Forest Moss. Finally to finish off I colored in the leaves in Patina Stickles.
Thank you for looking.

Friday, July 23, 2010

Happy Birthday Roberta

This is my most unique card yet! In celebration of my mother-in-law's ____th birthday, I took her drawings and asked a local rubber stamp company if they could make the drawings into a stamp. Actually we decided to make two stamps. One is just the head and the other is the dress so I can add the head to other designs down the road. This stamp set I am affectionately calling "Roberta".

I wanted this little beauty to dazzle just as my mother-in-law does so I blinged her up with Stickles and Perfect Pearls. With liquid pearls I made even her cuffs and waist shimmer in gold.

Thursday, May 6, 2010

It's All Heart

Last night I took some white cards out and stained them with different Distressed Ink. It was a great way to relax. If you need to make several cards at once but don't want boredom to set in and want to see what happens with different colors this is a very simple design. The card above was made using Antique Linen and Brushed Courduroy Distressed Inks. The design was filled in using Waterfall Stickles.


The fun part about Distressed Inks and Stickles is that you can take the same image and give them a total different look. This card was used with Dusty Concord and Brushed Corduroy Distressed Inks and Lavender Stickles.

This card was made using the new Stormy Sky Distressed Ink and once again Brushed Corduroy. I wanted to use Golden Rod Stickles and then decided to make it colorful so I added Turquoise on the flower and outlined the large heart and fill in Magenta Stickles.


This was also used with one of the new distressed inks, Victorian Velvet. This is one of my favorite Stickle colors, Fruit Punch.
The name is fun and perfect. In addition I love the pink color. It is an excellent match with this color card.
At www.lindascozycraftcorne.etsy.com, there are three different ways to purchase Stickles. I am selling them single, triple choice, or 6 pack choice. Happy shopping!!! Mother's Day is on Sunday don't forget your mom, mother-in-law, sister, daughter, in-laws, and wife. I also will package together custom orders. Soon I will be listing the new Distressed Inks that I have available for sale.

Monday, April 26, 2010

Liquid Pearls - A NEW LOVE

SALE! SALE! SALE! SALE! SALE! SALE! SALE! SALE! SALE! SALE! SALE! SALE!

I am posting this Monday, April 26, 2010 and for those of you that may be interested, I am having a MAJOR SALE on 24 colors from Ranger Ink Distressed Inks www.lindascozycraftcorne.etsy.com. The sale ENDS, Friday, April 30, 2010. Only 5 days left!


Last week I wrote about Ranger's Alcohol Inks used with Silver or Gold Metallic ink and they make really pretty images. Today is another example of the use of alcohol inks except that I have now added a floral image. I believe the Stamp is from Stampin' Up Friend 24-7 Set. I stamped with Stazon Ink. I then went over the image using liquid pearl in green for the stem and leaves and pink around the flowers. I then filled in the middle areas with my all time favorite, Stickles.

Saturday, April 17, 2010

Alcohol


Purple Twilight, Raspberry, Sailboat Blue, and Metallic silver make a pretty combination. Like a storm of colored clouds swirling together to make the Perfect Storm. I put these colors on a piece of cotton and then swirled them around on glossy paper. Drops of color were added directly on the paper and then swirled around by a cotton ball. I then stamped a rose print using Black Stazon Ink which I then highlighted using Black Stazon Ink with Lavender Stickles. I then guarded the rose with butterflies each in their own color. There is Watercolor blue, Fruitpunch, Icicle, Turquoise to just name a few. Stickles were perfect for this project because of the fine tip that the bottle has makes the direction and distribution of the glitter glue more controllable.


Mother's Day is just around the corner. Let me know if you would like to make a similar card or would like to purchase one of the cards I am showing on this blog. Sometimes it is just fun to take out your inks, mix them together and see the color combinations that are attainable. (Hint: And if you make a mistake or don't like the color you have ended up with just keep adding more colors and eventually the color on your paper will be perfect for your project.)

Next time -- Using Liquid Pearls... Do you live in Chandler, AZ, contact me regarding my next class where you can make a similar card to the ones above.

Wednesday, April 7, 2010

My First Card Class


A couple of weeks ago I designed 10 cards for four very fun ladies. Some cards were made using a lot Stampin' Up designer paper and one or two stamps. I added bits of colorful paper and accessories like ribbons and the cards were very pretty. For the first time I designed square cards too which I like very much b/c they really show off the beautiful paper.
This card was made using Ranger Ink Faded Blue Jeans Distressed Ink. I first stained the paper all over and then went over it again with Distressed Faded Blue Jean Stickles. It also will stain paper in addition to leave a matted look. In addition, I then inked up the de flouris and Happy Birthday stamps in the Faded Blue Jeans ink. I also used one of the new punchers from Stampin' Up to make the fancy corners and use a heart shape punch to complete the card. I really like this color blue and have been enjoying using it.


I was first introduced to Ranger Ink a couple of years ago with their Stickles product. I decided to use the Sassy Suzie stamp set which is always great for light humor and showing off her jewelry and Stickles. Lots of bling bling going on with this lady.


I then went in a little different direction and had the ladies try Distressed Inks. The Card stock paper was purple in color. I used a purple color ink and sponged the paper to give it more of a vintage look. I then inked up a stamp with the Distressed Color. We then used Walnut Stain around the edges. I stained white ribbon with the purple ink.
A new method of staining that I started was to take a Distressed Resist Ink Pad and ink up a stamp with it and stamp on paper and then take a sponge and sponge over the image with a combination of Mustard Seed and Tainted Rose Distress Inks. I added a little Cotton Candy Stickles to the cake for an extra little sparkle.

Monday, March 22, 2010

Passover

Next week starts Passover so I made this card for my husband's family. Because I wish not to offend anyone, I checked with my sister-in-law before posting this card. I do not have a stamp that says Passover but I did have a Happy Pesach so I used that one. I made the background using my Star of David stamp. I then sponged the smaller square blue and embossed "Happy Pesach" using White Craft ink, and clear embossing dust. I then heated up the dust and was able to get this nice bright statement. I felt like it needed something more and because I didn't want to introduce a new color I didn't want to use the brads I had on hand. Therefore, I added Ice Stickles Glitter Glue. I am very happy with the results. Hopefully next year I will be able to design something a little more elaborate. I have an idea in mind but have to see how to put my idea on paper.


Thursday, August 13, 2009

What the Heck is a Stickle?

Recently, I have been marketing and promoting Ranger Inks Stickles and in return I have received the questions, "What the heck is a Stickle?" Stickles is a Ranger Ink product and it is glitter glue and it enhances images and adds sparkle to paper craft projects. I have been using Stickles for over a year now and really like the finished results that have been achieved. Last year I used Yellow and Black Diamond Stickles to enhance an image of a bee that I stamped on to some greeting cards.

Currently, I am working on Christmas cards and you can see the extra sparkle that has been achieved to the tree image. What was extra cool was that last weekend when I was working on my Christmas Trees I discovered that the Stickles that are simply titled Pink, match perfectly with Stampin' Ups Razzle Rasberry in color. I have Pink colored Stickles available and on sale now in my Etsy shop.


www.Lindascozycraftcorne.etsy.com

A Christmas Tree In Stampin' Ups Razzle Rasberry paper, Whisper White Craft ink and outlined in Icicles Stickles.

Santa is one of Stampin' Ups newest Stamps. (I am a Stampin' Up customer only. If you live in south Chandler and are looking for a demonstrator please contact me and I will be able to give you a wonderful demonstrator's name.) Ink was done in Glorious Green, Choc. Chip, Brilliant Blue and Basic Black. The corner leaves were given extra color using Holly Stickles.

Snowmen and snow balls were filled in using Diamond Stickles. They give off a pinkish tintand is really pretty.


What else makes Stickles so special is the fine applicator tip. Because the tip is small, it is very easy to control the amount that comes out of the bottle. You can write, draw, dot, dash and so much more. If you have any questions on the color or anything else, please contact me @ Lindascozycraftcorner@yahoo.com.

Thursday, July 9, 2009

A New Dimension


I've started a new dimension to my card project and to my Etsy store. I now have Stickles and alchol inks including gold and silver metallic mixatives. You can see above the effects of adding the metallic mixative to alcoholic inks.

It is simple too. I take my Tim Holtz Alcohol Ink Applicator and add some applicator felt (which fits perfectly to my applicator and then I dab some Adirondack Ink to the applicator. I then add some Metallic Mixatives to the color to give the ink a polished stone effect or marbling effect. I tended to add some more color over top of the metal ink to get a good amount of color on the paper.


I also wanted to show off my new line of glitter glue called Stickles. So I stamped a butterfly in Old Olive Stamin' Up ink. I then filled in the butterfly using Turquoise Stickles. I outlined the antennae with Crystal Ice Ice Stickles. I didn't want to cut out the butterfly so instead I used the Stampin' Up Scallop circle punch. I was going to add it on top of regular paper but I saw some glossy paper that I had sprayed some Adirondack Color Wash Stream to and thought the butterfly would look beautiful against that paper. I then saw my other paper that I had colored using the Yellow Sunshine, Orange Sunset and Purple Twilight and thought that would make a beautiful card for this butterfly. Therefore, I cut it down to size (5 1/2 x 8 1/2) scored it in half so the size is 5 1/2 x 4 1/4. I thought this would make colorful birthday card so pulled out my "On Your Birthday" set from Stampin' Up and stamped using the Stazon Ink. This worked perfectly with the alcohol ink. As you can see, the ink didn't smear at all.

Thursday, June 25, 2009

Anniversary Card


I have a loyal customer who has made personal requests for birthday, thank you and recently Father's Day and Grandfather's Day cards. This week she needed an anniversary card and so the challenge was on for me to come up with something.

I found it a bit of challenge partly because I don't even have an anniversary stamp. And then I wasn't sure which way to go. I found this great Cuddlebug folder entitled "Allegro". I stamped a heart stamp a few times on it in VersaMark and then used clear embossing powder on top. It seemed to need a little extra so I added Stickles on some of the musical notes. I should mention that I snipped the ends of the ribbon so they are not hanging, but I gave it to my husband to take to work with him before I remembered to take another picture.
I printed out Happy Anniversary on the inside on Very Vanilla paper.
Happy Anniversary Stacy and Jase!
Next week -birth announcements I am making for a friend of mine.