Monday, May 31, 2010

3 Dimensional Flowers

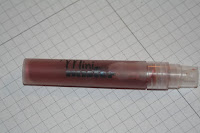
Did you ever start a project with one thing in mind but by the time you finished it, it was something completely different? Well, this was my flower project. I was planning on making this into a card. I was wondering how exactly it could be mailed with the flowers being 3 dimensional, but figured I would think of it as I progressed. I started out with the flower on the top. I used some colors that I haven't used until recently, Spiced Marmalade and Wild Honey and also another color that I don't use very often, Fired Brick. I then used one of my Mini Misters that I have been using here and there the past month. I then painted the tip of the top flower with Spiced Marmalade Cracked Paint.
Then I went through a pink phase (I have been having a lot of pink days lately) and painted a flower with another Cracked paint -- Tattered Rose. I colored another flower with a new Distressed Ink - Victorian Velvet and probably another favorite as I've been using it a lot lately. I also colored another flower with another new Distressed Ink color - Spun Sugar. I then painted the outside of the flowers with Pearl Dabber and Tattered Rose Re-inker and finally once again sprayed the flower with Berry Twist, Tattered Rose Re-inker drops and water combination in Mini Mister.
With the 3rd 3-dimensional flower, I tried Shabby Shutters, Broken China and Tumbled Glass. I covered the Shabby Shutters flower with matching Distressed Stickles. I painted these three flowers with Pearl Dabber paint and Broken China Re-inker drop mix. I also sprayed with Green Patina Perfect Pearls, Broken China re-inker and water combination in the Mini Misters.
I wanted to try out the Vintage Photo Embossing Powder so today I played with that too. I first inked up a larger open rose with Spiced Marmalade and covered the paper with the embossing powder, tapped off excess and dried with heating tool. I then used a smaller rose stamp in Distressed Embossing Ink and once again put the Vintage Photo Embossing Powder on the paper and repeated process.
Now, as I said, I can't use this as a card b/c the flowers will be crushed so I think I'll be off to find an appropriate frame for my Masterpiece (LOL).

Monday, May 24, 2010

Dabbers and Adirondack Alcohol Ink

Friday was like Christmas for me. My latest Ranger Ink order came so I spent Friday night playing with some products that I have been eyeing up for a while. I ordered Tim Holtz Textured Fades Emboss Folders - Damask/Regal Flourishes. It is a two-set embossing folder package. The example on the left is of the Damask Embossing Folder. I used a Pearl Dabber and a Sail Boat Blue Dabber on top of the embossing paper. Both of these are also new for me. I have been wanting to order them for a while but kept pushing it off. I then got some very positive feedback about the dabbers from my fellow on-line blogger, http://cards4ubylouise.blogspot.com/. I heavily dabbed on the outer edge of the larger centered card and then once again dabbed first using the Pearl Dabber. I then stamped my message and floral image. Before I dabbed again with the blue dabber I colored in using my alcohol inks. It made a very interesting effect. (To see a larger image of the card, double click on image and then you can click on the back arrow to come back to this post.)


I colored in the flowers and stems using Adirondack Alcohol Inks and Tim Holtz Refillable Pen. To add ink to the pen you need to use a tweezers and on the larger end pull at the base of the nib. However, do not pull on the nib itself but on the base. Once it is out take the tip of the alcohol ink and add in ink for about 3 - 5 seconds and then put nib back (you'll want to use the tweezers again). You need to then go to the smaller side and this time with the tweezers pull the nib out and once again add the ink for 3 - 5 seconds. Lay the pen down and wait for 5 minutes and then the nibs should no longer be white and you can start using the pen.
The priorities for Linda's Cozy Craft Corner is Customer Service and Great Prices. Please contact me regarding bundling a package together for you for even better prices. For the products above and more, please check out my Etsy store (www.lindascozycraftcorne.etsy.com).
Are you interested in a Tim Holtz or Ranger Ink product? If I have not shown it on my blog or have not listed on my Etsy store, please feel free to enquire to Lindascozycraftcorner@yahoo.com. Even if I don't currently have the item available, I might be able to order that item for you. If I can't obtain that item for you, I will try and direct you to another company that has that product. For example, perhaps there is a color or embossing powder that I do not currently have in stock. I have access to many different colos and would be happy to order a color that you need. Please feel free to contact me for Grungeboard products and Ideology products that I can make available. However, if I receive enough orders, I will be very happy to order it or add it to the next order that I place.

Friday, May 21, 2010

Worn Lipstick

I am trying to contact Jane who is the winner of my products. Jane, please email me so I can ship your goodies.


I got the floral stamp a few months ago, and it is one of my favorites b/c I love flowers. I stamped in Peeled Paint and then colored in the flowers using alcohol inks and Tim Holtz Alcohol Ink Fillable Pen.

First I brushed on the Worn Lipstick Ranger Ink (ink available http://www.lindascozycraftcorne.etsy.com/) and then I used a Mini Mister mixed with Re-ink Tattered Rose ink, Perfect Pearls, and water. I then stamped the flower image and filled in with color using alcohol inks (also available at my Etsy store). I then stamped Best Wishes on top of the flower stems and then I brushed on Perfect Pearl powder and then I brushed off the excess and that is how I got my shimmer embossed effect. To finish off the card I brushed the edges with Warn Lipstick, Black Soot (which I decided I didn't like on this particular card so I went over again with Walnut Stain and then again with Worn Lipstick). I wanted to add a little embellishments today so I pulled out my Satin ribbon from Stampin' Up and then a flower from the Pretties Kit (Stampin' Up), dyed the flower in Worn Lipstick and then for the center used a crystal brad. It is so pretty that if I have time I am going to make a few more cards today using this technique.


Tuesday was our 14th Wedding Anniversary. I am very blessed to have such a good husband. He took the day off and we saw Date Night which we both really enjoyed. I think it had items for both of us, romance, action, and humor. Anyway, this was my card for my husband this year. I used an ol' favorite Sassy Suzie. I actually used my Stampin' Up colored pencils and blender pens. I then highlighted her by sponging over in Tattered Rose. Now I have come to use and like a new tool. It is called Perfect Medium Pen. It is terrific b/c it gives me the liberty to write my own words. I wrote my message and then tapped Ancient Princess Gold and then used a heating tool to melt the gold.


Thank you for looking. Now off to run some errands.

Wednesday, May 19, 2010

New Colors


I would really like to give away the products that are shown at the top of this page. However, I cannot seem to get a hold of Jane. Jane, please email me at Lindascozycraftcorner@yahoo.com so I can arrange to ship these goodies out to you. Because I would like to share these items with those of you that were kind enough to visit, I am going to do another drawing on June 1 if I do not here from Jane by then.

The card at the top has a Spiced Marmalade background. I stamped the bird and the black speckles in black soot. I also colored some paper in Black Soot and then used a corner puncher to get the corner accents. The outer part of the card was distressed with Spiced Marmalade, Brick Red, and Vintage Photo. I then used Antiqued Bronze Distressed Stickles to go over the outside of the card.

This has been such a great week. Sunday, it was my birthday and once again I would like to thank those of you that stopped by. I have been itching to make more cards but there was some other things that I needed to do. And, yesterday, my husband and I celebrated our 14th Wedding Anniversary. He took the day off and we saw Date Night which was a funny and overall terrific movie. So today when I was trying to decide what to do, I decided to work with colors that I do not use very often but like. I used a variety of colors for this card. First I used some Spiced Marmalade and then spritzed with the Mini Mister. I had a concoction of Berry Twist Perfect Pearls, a drop of Antique Linen Re-inker and water. I then stamped a floral stamp with Worn Lipstick all over the card. I then spritzed once again with the Mini Mister. Then I used Black Soot (my first time I've used this color), I brushed on Blue Patina with the smaller brush and then used the larger to brush off the excess and once again used my Mini Mister. I decided to add a small "Get Well" tag that was colored using Mustard Seed and a spritz with the Mini Mister.

Sunday, May 16, 2010

AND THE WINNER IS:


I want to thank all of you for participating and sharing in my birthday celebration. I had such a great birthday. We went to the Cracker Barrel for breakfast and then later to the local pool. It was so much fun today reading your comments. Thank you for the well wishes. Congratulations to Jane who is my product winner and to Shannon who is my card winner today! Jane if you could please email me at lindascozycraftcorner@yahoo.com so I can contact you regarding shipping, I would really appreciate it. Thank you.

If anyone is interested in a particular color or product of Ranger Ink, please feel free to contact me and I will be glad to answer your questions and when possible, I will come up with a card idea for a particular product. If you would like to see the current list of colors I have available, please visit my Etsy shop at www.lindascozycraftcorne.etsy.com. I will be listing my Distressed Stickles this week. I am expecting a new shipment of products early next week and I am very excited as I've branched out and ordered some products that I haven't used yet.

Take care and I hope you visit again.

Sincerely,


Linda
Linda's Cozy Craft Corner

Happy Birthday

Perhaps when you were a child your mom or dad brought cupcakes to your classroom to celebrate your birthday. That tradition lives on in my children's school. That is what inspired me this year to do two give aways to celebrate my birthday.

The one give away is for crafting products. A picture of the products I am giving away is above. To the left is a picture of cards that I am giving away for those that may not like to craft but appreciate the beauty of hand made cards. All you need to do is indicate which give away you are interested. Also, if you let someone know and they visit my blog and they tell me who referred them, your name will be once again placed in my jar and your friend's name will be added to the jar too.

For those that may not be computer savvy but are interested in the cards, please feel free to email me Lindascozycraftcorner@yahoo.com and I will be happy to add your name to the jar too.

Thank you for playing and sharing my birthday with me!!!

We will be drawing names at 9:00 PM PST.

Linda

Saturday, May 15, 2010

Happy Birthday Princess


Tomorrow is my birthday and I am doing 2 give aways. There may be one more depending on how many people checkout my blog. I will be giving away the following Ranger Ink Products: A few bottles of Stickles the product that got me started using Ranger Ink. A Tim Holtz Distressed Ink and matching Distress Stickles bottle and one more bottle of Distressed Stickles, Perfect Pearls with two brushes, Perfect Pearl Pen and an Ancient Gold Embossing Powder. What do you need to do to win? Please leave a comment tomorrow. I will be showing off another card and you can leave your comment. Please refer people to my blog tomorrow. If they remember to let me know your name, you will get additional chances to win.


I have friends and family who like hand made cards but have no crafting desire at all and so for those that appreciate hand made cards, I will also be having a drawing to win 3 cards. A birthday card, a thank you card, and one more card. They may either leave a message in the comments section or send me an email letting me know that they checked out my blog. So once again, if you have friends and family that may not like crafting let them know about my card give away so they can have a chance to win. Also, make sure they tell me that you referred them b/c the more times your name is mentioned the more chance you have of winning.


This card was made using Ancient Gold Princess Embossing Powder. I have found that this Embossing Powder is the best to use for lettering. It is very very fine so it goes on nicely and melts and is not chunky like some of the other Embossing Powders. I also like it b/c it just has this delicate yet royal look to it once melted. I used several different Distress Inks for this card: Vintage photo, Victorian Velvet, Antique Linen and Forest Moss. Also I used SU scroll punch for the borders, SU oval punch, and various SU Stamps.

Thursday, May 13, 2010

A Welcomed Distraction

Well, I was planning on showing off another card and another Ancient Gold today but I got distracted. First, there was some cleaning to do, and laundry. My 10 year old son said to me the other day that he's tired of cleaning and that it's the same thing over and over again. I might add that this statement came when I was in the middle of dishes. Dishes also seem to be a never ending chore.

I found a blog the other day that I really enjoyed http://artsaveslives-paperqueen.blogspot.com/2010/05/tags-card.html. I asked Eileen how she got her beautiful background because I have been wanting to do something different for a very long time. She graciously gave me Penny's information http://pennyduncancreations.blogspot.com/p/blog-headersbackgrounds.html. Thank you very much ladies.

Well, tomorrow my little one receives a certificate from pre-school and my older one (actually my hubby) is getting a wisdom tooth pulled. So I'm not sure if I'll be able to check back in or not. Does one acquire more wisdom or less with less wisdom teeth? Hm, well he lives with me and my craziness so he needs to be wiser as he gets older. Speaking of getting older, make sure you check out my blog this weekend and especially Sunday as I'm going to have some give aways but you need to play.

Take care.

Linda

Tuesday, May 11, 2010

Thinking of Christmas

It is a little early to think about Christmas. However, being a card maker, creator it is never too early. My goal has been to dedicate
at least one day a month to design and work on my family Christmas cards and also cards to sell. Well, it is May now and I keep needing to shift that goal. When I was thinking about using the different embossing powders, I thought of this stamp and wondered how it might come out using the powders. I decided to give a distressed look and so this is how I came up with the image.

First, as I mentioned in my previous blogs this week, I used an embossing cloth and rubbed the paper with it to take away any static electricity. I then stamped using Perfect Medium Ink. For this image I tried Ancient - Antique Gold Embossing Powder. I used a heating tool to melt the gold embossing powder. I knew from the beginning I didn't want a gold embossed Santa on striking white paper. However, I wasn't sure of the colors that I wanted to use. I decided to use Antique Linen Distress Ink and Crushed Olive Distressed Ink (NEW INK). For the border I used Walnut Stain and Fired Brick Distressed Ink. I then went over the color with Fired Brick Distressed Stickles and Aged Mahogany Distressed Stickles.
Next time - Ancient Gold - Princess Gold Embossing Powder. It is so delicate and pretty and elegant. I have found that it looks really pretty for embossing words.

Monday, May 10, 2010

Faux Foil


On Saturday, I was playing around with some of my Ancient Gold Embossing Powders. I was really enjoying seeing the different effects the different embossing powders had on the paper. At some point I wanted to try Perfect Pearls in addition to the embossing powder. Above is Ancient Gold Antique Embossing Powder. I put water, a few drops of Old Paper Reinker and Gold Heirloom Perfect Pearls in a Mini Mister and shook the mister so everything would mix together. I then spritzed the paper with the Mini Mister mixture. The result was a foiled looking front.

Today I tried it again using different colors. I used Ancient - Roman Gold Embossing Powder. First I used an anti-static embossing cloth and then I stamped the image with Perfect Medium ink and tapped the embossing powder on top. Then I used a heating tool to melt the gold powder.

I decided to try making a foil looking card again. However, this time I wanted to try a different color so I mixed together water, Tatter Rose Reinker, and Inference Red Perfect Pearls in a Mini Misters. I then spritzed the paper with the mixture and the finished look is pink foil.


Here is the finished look. The tag "Best Wishes" was embossed with Ancient - Princess Gold Embossing Powder. I also stained it using Crushed Olive. I hope you check back again as more ideas are coming this way this week.

Saturday, May 8, 2010

It's Gold

Happy Mother's Day! I made a couple of Mother's Day Cards a few weeks ago. These cards are shown on an earlier postfrom last month. This morning I was working on some other greeting cards. I have been wanting to see what the difference is with some of the Ancient Gold Embossing Powders. Today I embossed different images using African, Roman, and Princess, and Antique Gold Embossing powders. Throughout the week, I will finish up my projects, and post pictures of the cards.


The best thing to do before stamping is to rub the paper you are going to use with either embossing cloth or use some talc powder. Then I stamped the image with Perfect Medium. I then tapped out some embossing powder. And Finally ran it over with a Heating tool.


This card was made using Roman Gold Antique Embossing Powder. I used Distressed Inks on the background. I also used Distressed Inks on the strip of paper. Princess Gold Embossing Powder was used on the oval. I then Distressed the oval scallop punch out with Old Paper Distress Ink.

Thursday, May 6, 2010

It's All Heart

Last night I took some white cards out and stained them with different Distressed Ink. It was a great way to relax. If you need to make several cards at once but don't want boredom to set in and want to see what happens with different colors this is a very simple design. The card above was made using Antique Linen and Brushed Courduroy Distressed Inks. The design was filled in using Waterfall Stickles.


The fun part about Distressed Inks and Stickles is that you can take the same image and give them a total different look. This card was used with Dusty Concord and Brushed Corduroy Distressed Inks and Lavender Stickles.

This card was made using the new Stormy Sky Distressed Ink and once again Brushed Corduroy. I wanted to use Golden Rod Stickles and then decided to make it colorful so I added Turquoise on the flower and outlined the large heart and fill in Magenta Stickles.


This was also used with one of the new distressed inks, Victorian Velvet. This is one of my favorite Stickle colors, Fruit Punch.
The name is fun and perfect. In addition I love the pink color. It is an excellent match with this color card.
At www.lindascozycraftcorne.etsy.com, there are three different ways to purchase Stickles. I am selling them single, triple choice, or 6 pack choice. Happy shopping!!! Mother's Day is on Sunday don't forget your mom, mother-in-law, sister, daughter, in-laws, and wife. I also will package together custom orders. Soon I will be listing the new Distressed Inks that I have available for sale.

Monday, May 3, 2010

New Fun


It has been a great couple of weeks for my family and my little on-line shop (www.lindascozycraftcorne.etsy.com). I had a sale on my Distressed Inks last week. That was a lot of fun as I got to "meet" new people through email and through Etsy. I got my first international business which was very exciting for me. My son got a basket in his basketball game. We celebrated my husband's birthday. I'll have to show you next time the football tickets I made up for him with the intent that he will go to a Dallas game this fall.
I received a request for the new 12 Ranger Ink Distressed inks a few weeks back so I gladly ordered those and since I need to order in bulk I opened some of the colors. One of the colors is Pumice Stone which I used on the center piece of the card. I then stamped a flower in black ink and filled in with Perfect Pearls Berry Twist. I used the Swiss Dots folder and Cuddlebug. I then stained the paper with Shabby Shutters Distressed Ink and stained over with Shabby Shutters Distressed Stickles. I have been using the Distressed Stickles a lot lately and first they slightly change the stain color and mellow them down which I love and on top give a beautiful matted finish to the cards.
I also used the Shabby Shutters Distressed Stickles on the Thank You part of the card. Thank you for my friend Patti who loaned to me forever ago a beautiful greetings stamp set and I really need to get creating so I can give them back to her. I love the lettering of this particular stamp set and haven't seen anything equivalent to it. I finished off my card using one of Mini Misters. I put a small amount of Perfect Pearls in the tube, added water, shook the Mini Mister bottle and then sprayed the card. It gives a dazzling shimmer to cards.